mBot2 is powered by Quard RGB sensor
If you are looking for a replacement part for your mBot 2 then look no further.
Quad RGB Sensor uses visible light as fill lights, which significantly reduce the interference of ambient light. In addition, it provides the function for recognizing colors. The new ambient light calibration function also reduces the interference of the ambient light in line following. With four light sensors, it can support more programming scenarios.
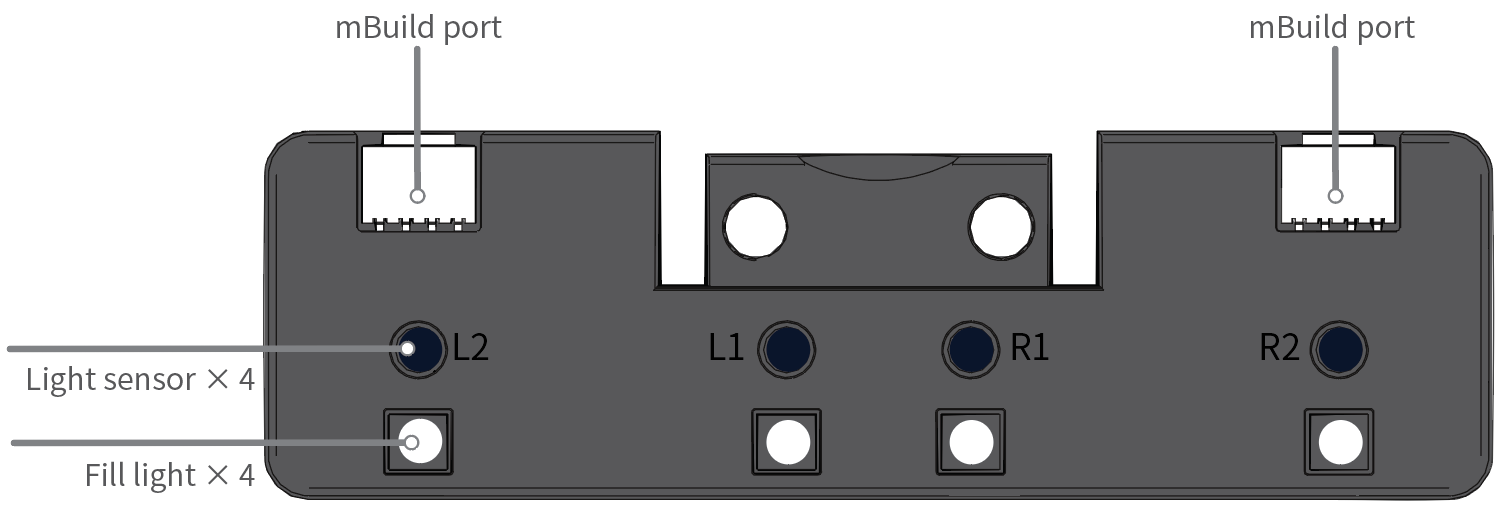
| Quad RGB sensor | Dual RGB color sensor | |
| Plastic casing to improve the durability and quality | Yes | No |
| Line-following sensor | 4 | 2 |
| Color sensor | 4 (also serve as line-following sensors) | No |
| Light sensor | 4 (also serve as line-following sensors) | No |
| Fill light | Visible light | IR light |
| Ambient light calibration to significantly reduce the interference of ambient light | Yes | No |
Specification
Detection range: 5–15 (mm) from the object to be detected
Button description
- Double-press: When the button is double-pressed, Quad RGB Sensor starts to learn the background and line for line following.
Place the light sensors on the background of the line-following track map and double-press the button. When you see the LEDs indicating the line-following state blink quickly, sway the sensors from side to side above the background and line until the LEDs stop blinking. It takes about 2.5 seconds. The parameter values obtained are automatically stored. If the learning fails, the LEDs blink slowly, and you need to start the learning again.
- Long-press: When the button is long-pressed, Quad RGB Sensor switches the color of the fill lights. Generally, you don’t need to change the color. The color is set automatically after the learning is complete.
Programming guidelines
You can use mBlock 5 to program Quad RGB Sensor.
Connect Quad RGB Sensor to CyberPi, add CyberPi and connect it to mBlock 5, and then add the Quad RGB Sensor extension. For details about how to add CyberPi and connect it to mBlock 5 and how to add the extension, see “3.2 Add and connect mBot2” in the mBot2 Operation Guide.
Set the detection mode
Quad RGB Sensor can be programmed to detect either of the following:
- color
- grayscale
For color detection, Quad RGB Sensor measures the light reflected by an object in terms of its Red, Green, and Blue (RGB) values. Eight colors are available.
To detect a color, you need to select a color in the block to be used, for example:
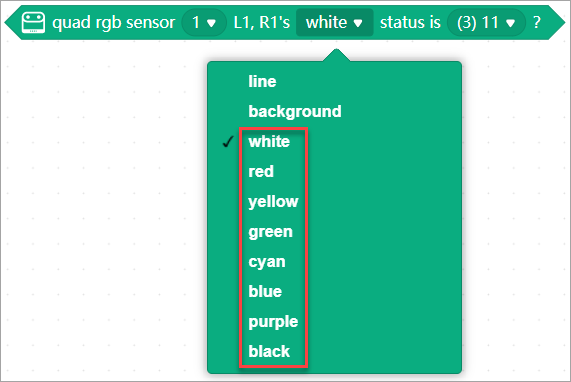
For grayscale detection, Quad RGB Sensor measures the intensity of the light reflected by an object regardless of its color.
To detect grayscale, you need to select line or background in the block to be used, for example:
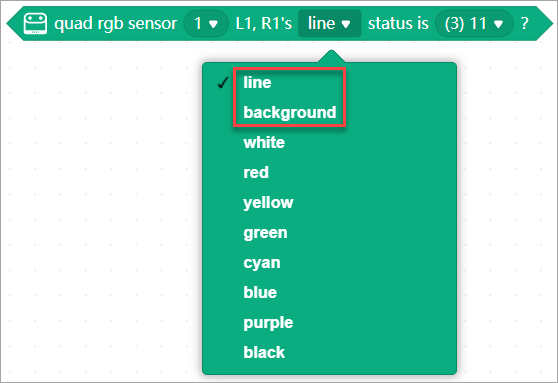
Obtain the output values
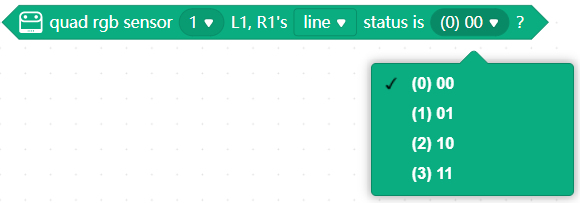
Quad RGB Sensor can output values based on the color or grayscale it detects, and you can obtain these values by using the reporter blocks, for example:

Change the color of the fill lights
You can change the color of the fill lights between green, red, and blue by long-pressing the button or by using the following block:

Note: Quad RGB Sensor can detect colors regardless of what color the fill lights are.
You need to change the color of the fill lights in some application scenarios. For details, see “Line detection scenarios” in the following.
Line detection scenarios
Before you use Quad RGB Sensor to detect lines, you need to perform basic calibration on it.
Basic calibration
- Place the sensor on the background and double-press the button on the sensor, and then swipe the sensor horizontally over the line and background.
- Check the two light sensors in the middle (L1 and R1). If the robot is on the line, the blue LEDs of both the light sensors are supposed to be off. The two LEDs are turned on and off alternately when you swipe the robot over the line.
Tips: Quad RGB Sensor can detect dark lines on light backgrounds regardless of the color of the illumination.
The following describes multiple line detection scenarios, and the blocks and setup recommended for each scenario.
Scenario 1: Black line + white margin around line + white background
For example:

Perform basic calibration on Quad RGB Sensor, so that it can recognize the line and background. For details, see
| Level | Purpose and block(s) recommended | Remarks |
| 1a: junior |
| |
| 1b: middle | 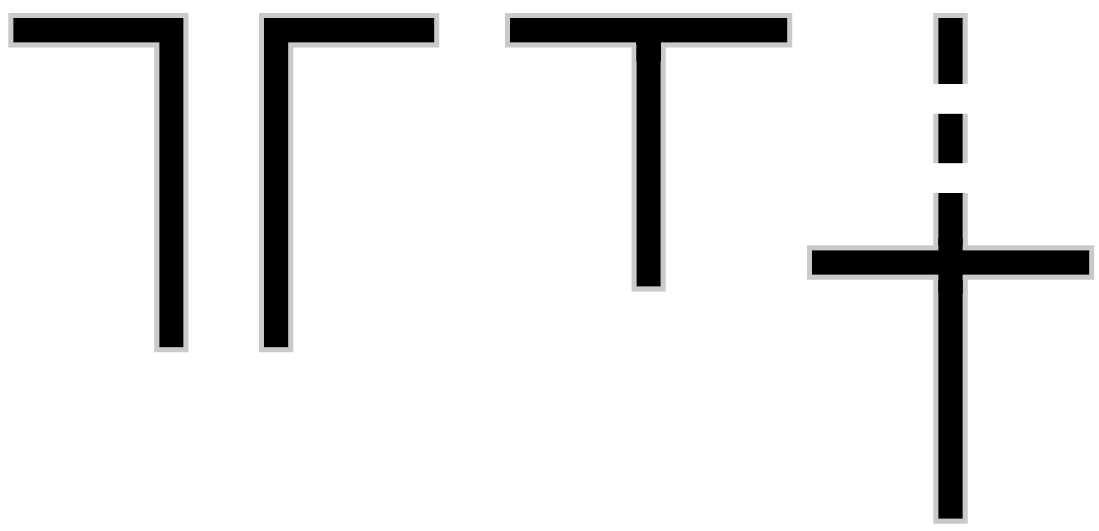 To detect crossings
| Quad RGB Sensor can’t overlook the line, and therefore it can’t determine whether a T-junction is actually a crossing (“+” shape, the actual line continues after the T…). This can only be checked by driving straight over the T and check if the line continues. |
| 1c: advanced | To implement smooth line following:
| Check the output value of this block. Switch the color of the fill lights to make sure that the output value is 0 when the robot is put in the middle of the line. The color of the fill light may have slight impact on the output value. |
Scenario 2: Black line with colored sections + white margin around line + white background
For example:

The purposes and blocks recommended are the same as those in Scenario 1 described in the preceding, but special preparation is required.
Either of the following ways can be used:
- Perform the basic calibration on the lightest color among the colored sections, for example, yellow, so that all darker colors are recognized as black.
- Perform basic calibration on the black line, and then long-press the button on the sensor to change the fill light and see if the sensor recognizes the different colored sections as the line to be followed.
- red section: use the green or blue/white fill light
- yellow section: use the blue/white fill light
- green & blue section: all fill lights work
Important to know:
- If you have set the color of the fill lights on mBlock 5, the calibration resets the fill lights (each fill light cycles through r/g/b illumination fast).
- Colored sections inside the line to be followed may affect the advanced, smooth line following (recognized as the deviation from the line). For example, when the basic calibration is done on yellow, the blue section may be reported as a deviation even if it is 100% on the line.
Scenario 3: Single-colored line + white margin around line + white background
For example:

Perform basic calibration on Quad RGB Sensor, so that it can recognize the line and background. For details, see Basic calibration described in the preceding.
The purposes and blocks recommended are the same as those in Scenario 1 described in the preceding.
Note:
- If you use the deviation reporter block, long-press the button on Quad RGB Sensor to switch the color of the fill lights to make sure that the output value is 0 when you put the robot in the middle of the line.
- It is not recommended to use the deviation reporter block when the contrast between the line and background is low.
Scenario 4: Black line + white margin around line + colored background/illustrations
For example:
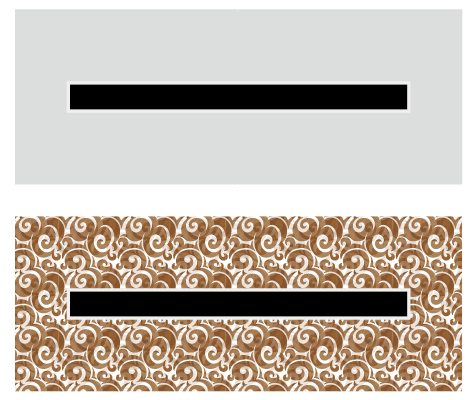
Perform basic calibration on Quad RGB Sensor, so that it can recognize the line and background. For details, see Basic calibration described in the preceding.
| Level | Purpose and block(s) recommended | Remarks |
| 4a: junior |
| |
| 4b: middle | 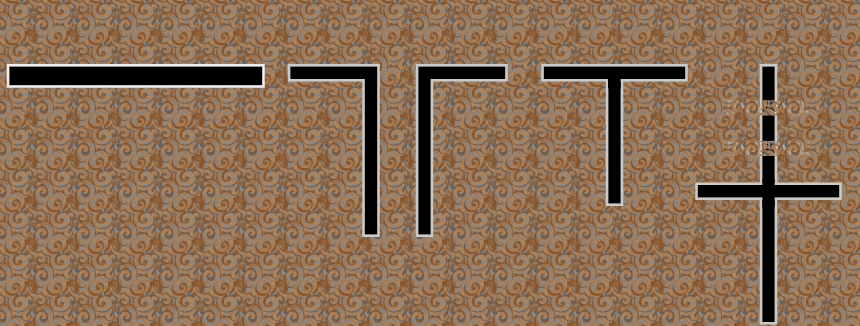 To detect crossings:
| The outer areas (background) may be recognized as the line to be followed, depending on the light conditions. When this happens, you can use only the L1 and R1 light sensors to detect lines, or make sure that the white margin around line is wide enough to keep the sensors from detecting the outer background. |
| 4c: advanced | To detect deviation from the line:
| If the colors of the outer areas are close enough to the color of the line to be followed, the output value of the deviation reporter block may be affected, and thus line following may fail. In this case, long-press the button on Quad RGB Sensor to change the color of the fill lights, making sure that the difference between the line and background is recognized. The blue LEDs are turned on and off alternately when you swipe the robot over the line. If you use the deviation reporter block, switch the color of the fill lights to make sure that the output value is 0 when the robot is put in the middle of the line. The color of the fill light may have large impact on the output value. |
Scenario 5: Black line + single-colored margin around line + white background
For example:

Perform basic calibration on Quad RGB Sensor, so that it can recognize the line and background.
The purpose and blocks recommended are the same as those in 1a of Scenario 1. Crossing detection and deviation detection are not recommended, because the margin around lines may be recognized by L2 or R2 as the line to be followed.
Tips: You can also program Quad RGB Sensor to detect white lines on black or colored backgrounds.
Color detection programming examples
Example 1: Obtain the values of RGB detected by sensors of the quad RGB sensor
Use the following program to display the values of RGB detected by the sensors of the quad RGB sensor on the screen of CyberPi:
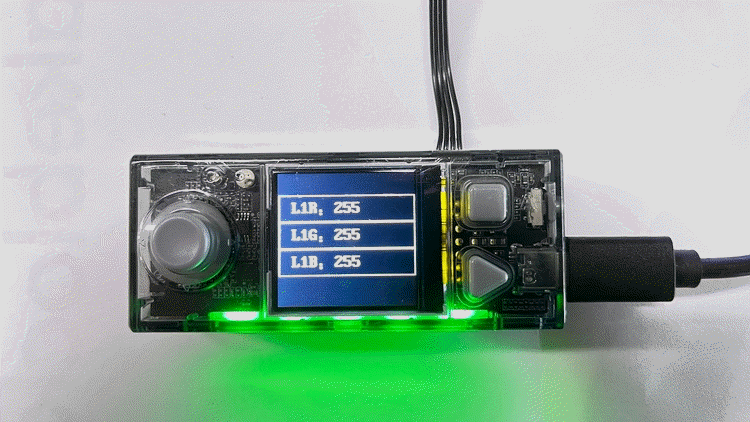
Example 2: Define a color and its tolerance
- You can define a color with the following RGB ranges:
- R: 0–255
- G: 0–255
- B: 0–255
- Tolerance
For example, set the block as follows.
![]()
| R | G | B |
Initial RGB values | 255 | 40 | 40 |
If tolerance is set to 10, then: | |||
Upper limit of RGB values | 255 | 50 | 50 |
Lower limit of RGB values | 245 | 30 | 30 |
You can set the tolerance based on the ambient light and object color differences.
Example program:

After you start CyberPi, the LEDs on CyberPi light up in green when the color defined by you, red in this example, is detected by both sensors R1 and L1. Otherwise, the LEDs on CyberPi are on in red.
Example 3: Tell the color of an object
Example program:

(1) Place the quad RGB sensor over the object of which the color is to be recognized.
(2) Press button A on CyberPi. The color of the object is detected and the RGB values are displayed on the screen of CyberPi.
(3) Press button B on CyberPi. The RGB values are cleared from the screen on CyberPi.
Block added for quad RGB sensor calibration
![]()
Why do I need to perform calibration on the quad RGB sensor?
The performance of the quad RGB sensor may be significantly affected by the ambient light, map, color card, or the distance between sensors and the object to be detected. Therefore, performing calibration on the quad RGB sensor in the environment and conditions where it is to be used can improve the detection accuracy.
Calibration preparation
- Update the firmware to version 011, and update the Quad RGB Sensor extension to the latest version.
- Assembled mBot2, or CyberPi + mBot2 Shield + quad RGB sensor
- White paper of A6 or larger, or the white area on the mBot2 line-following map
- Find a place with common room light instead of intense light
Calibration steps
(1) Connect the quad RGB sensor to the mBuild port on mBot2 Shield or CyberPi by using an mBuild cable.
(2) Connect CyberPi to your computer by using a USB cable.
(3) Open mBlock 5 and connect CyberPi to mBlock 5.

(4) Add the Quad RBG Sensor extension.

(5) Write the following program and upload it to CyberPi. Alternatively, you can write a program in Live mode.

The calibration process is short. Place the quad RGB sensor (12 mm to 13mm recommended) over the white paper before you start the calibration program.

During the calibration, the fill lights are lit up in other colors and then reset to the pre-defined color, which looks like blinking. When the calibration is complete, it says “Calibration completed” on the screen of CyberPi. You can execute the program to perform calibration on the quad RGB sensor again.
Block added for switching color detection mode

What does the color detection mode mean?
The algorithm of the quad RGB sensor is performed based on the hue, saturation, value (HSV) color model. The standard mode refers to the threshold used in earlier firmware versions, and the color-enhanced mode is added to the latest firmware, in which the threshold is adapted to application scenarios based on the HSV model. You can select a color detection mode as required.
Notes
By default, the standard color detection mode is used when this block is not executed.
To switch back to the standard mode after you have used the color-enhanced mode, you can use either of the following two ways:
- Delete the sets color detection mode to () block from your program. But note that you need to power off CyberPi and restart it to make the standard mode take effect.
- Use the sets color detection mode to () block and select the Standard mode.
mBot2 Replacement Parts:
mBot2 replacement part mBot2 ShieldmBot2 replacement part Cyberpi
mBot2 replacement part Ultrasonic Sensor 2
mBot2 replacement part Slick Tyre
mBot2 replacement part Wheel Hub
mBot2 replacement part Encoder motor
mBot2 replacement part Encoder motor cable (L=180mm)
Shipping rates Australia wide and New Zealand
FAQ:
- How do I estimate shipping for my order?
- Add products in the shopping cart and head to the checkout page to estimate the shipping.
Dispatch time
Unless expressly agreed otherwise with you, we will not commence delivery of an order until we have received cleared payment of the purchase price in full.
All orders placed before 11 am AEST (Monday to Friday) will ordinarily be processed on the same day.
We will endeavour to ship the Products by the applicable time indicated on the website, but all times are indicative only. All shipping times are dispatch times only, and actual delivery dates will depend on the shipping method chosen, delivery address and delivery service provider.
Note- Please make a note during purchase if you require any item urgently. However we cannot guarantee that we will be able to comply with any request.
*Go to Australia post delivery time calculation to get various Australia post service in your area please use our shipping postcode Thomastown, 3074 as the "from" address - https://auspost.com.au/parcels-mail/delivery-times.html?ilink=tools-open-deliv-times.
We ship all products throughout mainland Australia, Tasmania and New Zealand - Including Darwin, Melbourne, Sydney, Tasmania, Adelaide, Brisbane, Perth, all metro and regional areas but do not deliver to areas in Australia where the Australia Post delivery network is not available.
Check Express shipping delivery coverage area at - http://auspost.com.au/parcels-mail/delivery-areas.html
Receipt of deliveries
Deliveries to post office boxes are not permitted where delivery is by courier. If delivery is by courier and nobody is available at the delivery address to accept delivery when delivery is attempted then the courier may either:
- leave the relevant parcel at the unattended address (the courier will do so if specified in your delivery requirements); or
- re-attempt delivery at a later time or date, in which case we may charge you an additional re-delivery fee.
Note that if a delivery is left unattended at the shipping address and is subsequently stolen then the theft is your responsibility, not ours.
Payment & Security
Your payment information is processed securely. We do not store credit card details nor have access to your credit card information.


